Reduce the Size of PDFs on macOS
The quartz filter in Preview.app can be used to reduce the size of PDFs. In fact, new filters can be created without using the command line.
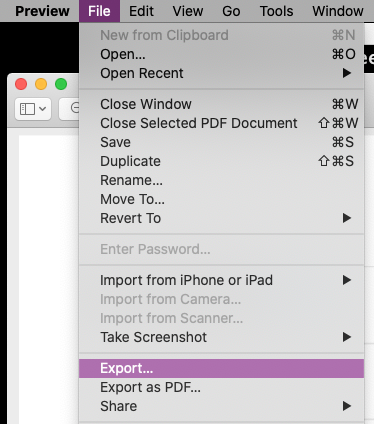
First, though, in Preview, select File>Export...:

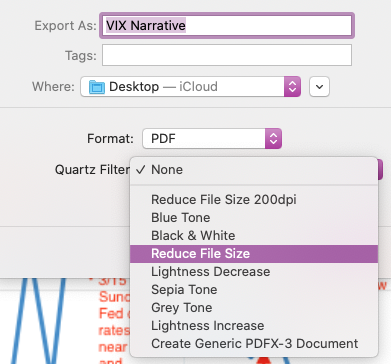
Choose a filter:

These filters are stored in /System/Library/Filters:
$ ls -laF /System/Library/Filters
total 360
drwxr-xr-x  10 root wheel   320 24 Aug 2019 ./
drwxr-xr-x 116 root wheel  3712 27 Nov 19:46 ../
-rw-r--r--   1 root wheel 37563 24 Aug 2019 Black & White.qfilter
-rw-r--r--   1 root wheel 44455 24 Aug 2019 Blue Tone.qfilter
-rw-r--r--   1 root wheel 79369 24 Aug 2019 Create Generic PDFX-3 Document.qfilter
-rw-r--r--   1 root wheel 44475 24 Aug 2019 Gray Tone.qfilter
-rw-r--r--   1 root wheel  4772 24 Aug 2019 Lightness Decrease.qfilter
-rw-r--r--   1 root wheel  4736 24 Aug 2019 Lightness Increase.qfilter
-rw-r--r--   1 root wheel  1133 24 Aug 2019 Reduce File Size.qfilter
-rw-r--r--   1 root wheel 44480 24 Aug 2019 Sepia Tone.qfilter
The filters are xml plists:
<?xml version="1.0" encoding="UTF-8"?>
<!DOCTYPE plist PUBLIC "-//Apple Computer//DTD PLIST 1.0//EN" "http://www.apple.com/DTDs/PropertyList-1.0.dtd">
<plist version="1.0">
<dict>
        <key>Domains</key>
        <dict>
                <key>Applications</key>
                <true/>
                <key>Printing</key>
                <true/>
        </dict>
        <key>FilterData</key>
        <dict>
                <key>ColorSettings</key>
                <dict>
                        <key>DocumentColorSettings</key>
                        <dict>
                                <key>CustomLHSCorrection</key>
                                <array>
                                        <integer>8</integer>
                                        <integer>8</integer>
                                        <integer>8</integer>
                                </array>
                        </dict>
                        <key>ImageSettings</key>
                        <dict>
                                <key>Compression Quality</key>
                                <real>0.0</real>
                                <key>ImageCompression</key>
                                <string>ImageJPEGCompress</string>
                                <key>ImageScaleSettings</key>
                                <dict>
                                        <key>ImageScaleFactor</key>
                                        <real>0.5</real>
                                        <key>ImageScaleInterpolate</key>
                                        <true/>
                                        <key>ImageSizeMax</key>
                                        <integer>512</integer>
                                        <key>ImageSizeMin</key>
                                        <integer>128</integer>
                                </dict>
                        </dict>
                </dict>
        </dict>
        <key>FilterType</key>
        <integer>1</integer>
        <key>Name</key>
        <string>Reduce File Size</string>
</dict>
</plist>
…where you can edit values (such as the ImageScaleFactor above). Or create a duplicate with different values.
However, there is actually a tool in macOS that allows you to create and modify these filters through a GUI. Believe it or not, it’s in the ColorSync app!

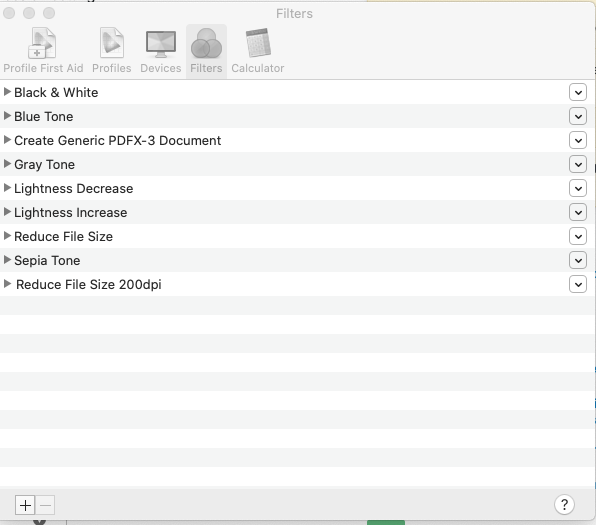
In the “Filters” tab, you can modify or create new filters which will appear in Preview’s filter list.
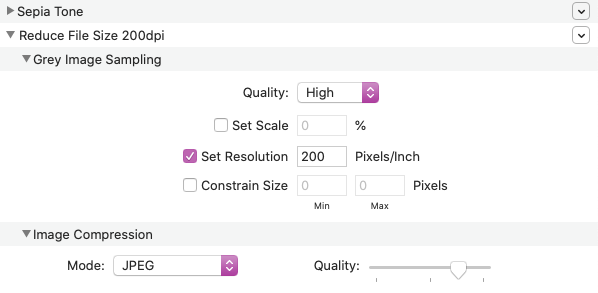
In this case I created a new “Reduce File Size 200dpi”:

If you look at the second image above, you can see that this filter is available in Preview.